General Information
KMail is a mail client for the Linux Operating system. Below are the instructions on how to set up KMail for an LSUMail Account.
KMail can be used with Modern Authentication for use on and off-campus. Due to Conditional Access rules, we suggest using the kmail-ews plugin for off-campus use. We do not recommend using IMAP for KMail as this legacy protocol will be blocked while off-campus. See the Conditional Access article for more information on supported clients and Conditional Access scenarios.
Currently, KMail + EWS, Evolution, and Thunderbird are the only identified methods for using a mail application with Office365 and Modern Authentication on Linux. Developers for other applications may also update their programs to work with Modern Authentication; please check their documentation for further information. Our recommendation is still to use the officially supported Outlook Web Access on Linux clients.
To Set up KMail for LSUMail:
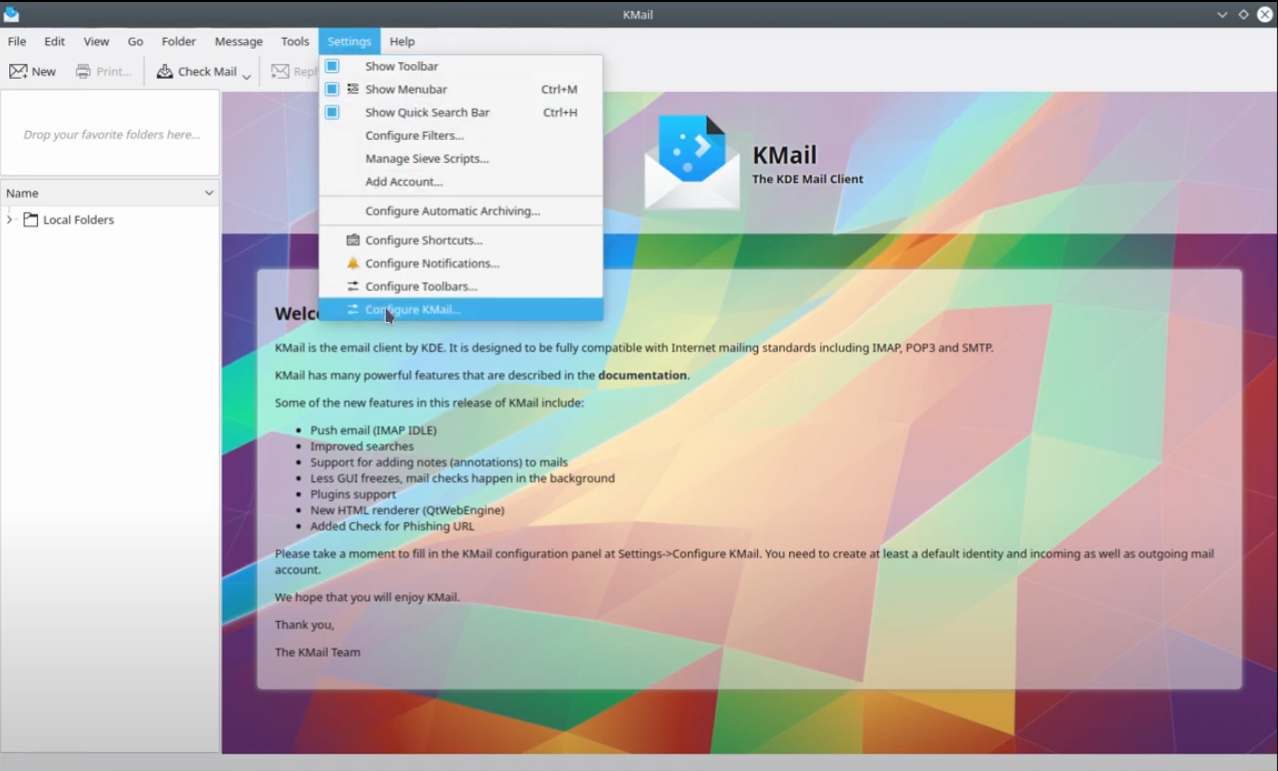
1. Open the KMail e-mail client and navigate to Configure KMail under the Settings dropdown.
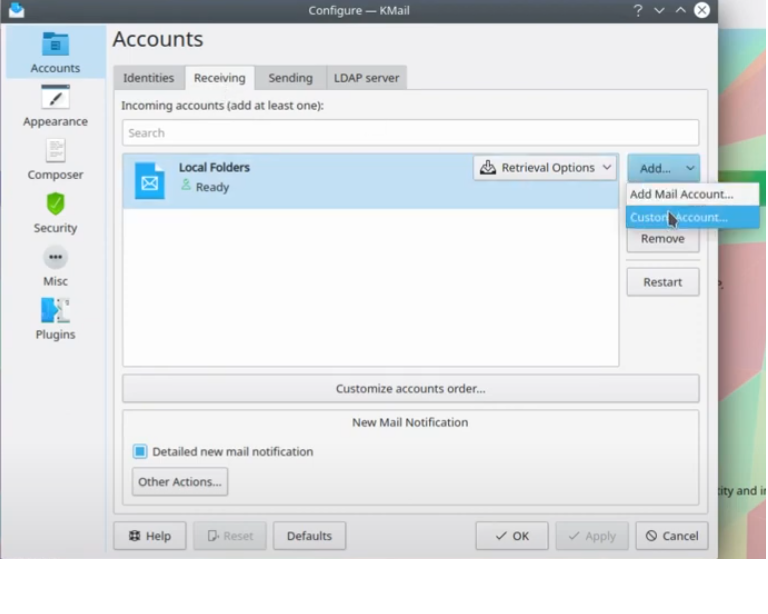
2. Under Accounts, go to Add and create a Custom Account.
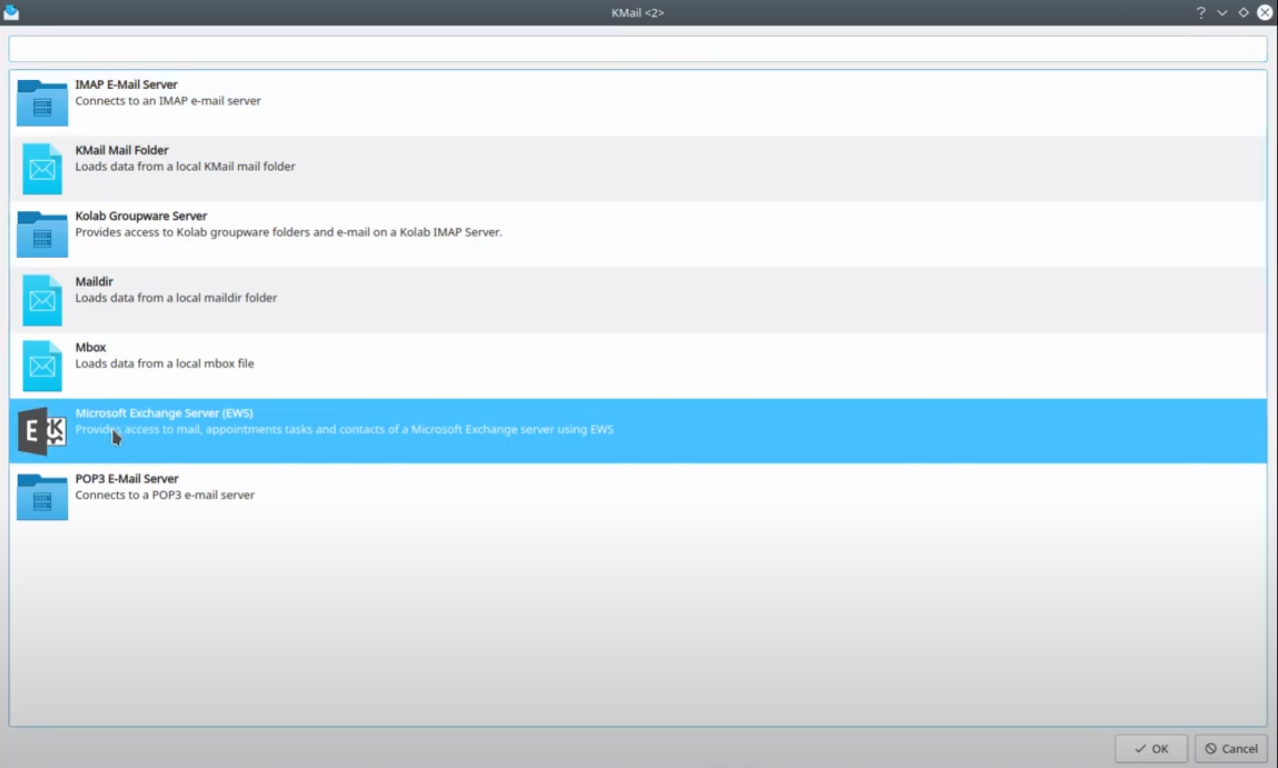
3. Choose Microsoft Exchange Server (EWS) under the KMail account options.
4. Under the Account Information on the following screen, enter the given configuration information:
Server Type: Select Exchange Web Services (if this is not available, install the evolution-ews package)
Authentication: Drop down the box and select OAuth2 (Office365) (if OAuth2 is not available, hit "Check for Supported Types" and try again)
EWS URL: https://outlook.office365.com/EWS/Exchange.asmx
After the OAuth information is done, scroll back up to the Username/Password radio button and select it.
Username: Enter your @lsu.edu e-mail address
Password: Enter the password corresponding to your @lsu.edu e-mail address.
When finished, click OK.
5. You should now successfully be able to receive incoming emails through Microsoft EWS.
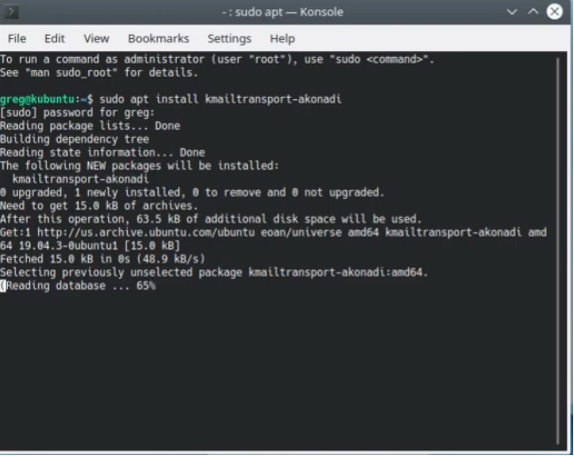
- Note: For Ubuntu or minimalist distros, sending emails will have to be enabled through the kmailtransport-akonadi package by running sudo apt install kmailtransport-akonadi in the terminal.
6. After package installation, you can create an outgoing email account in KMail by navigating to Settings -> Configure KMail -> Accounts -> Sending and choosing the now visible Microsoft Exchange Server (EWS) Mail Transport option.
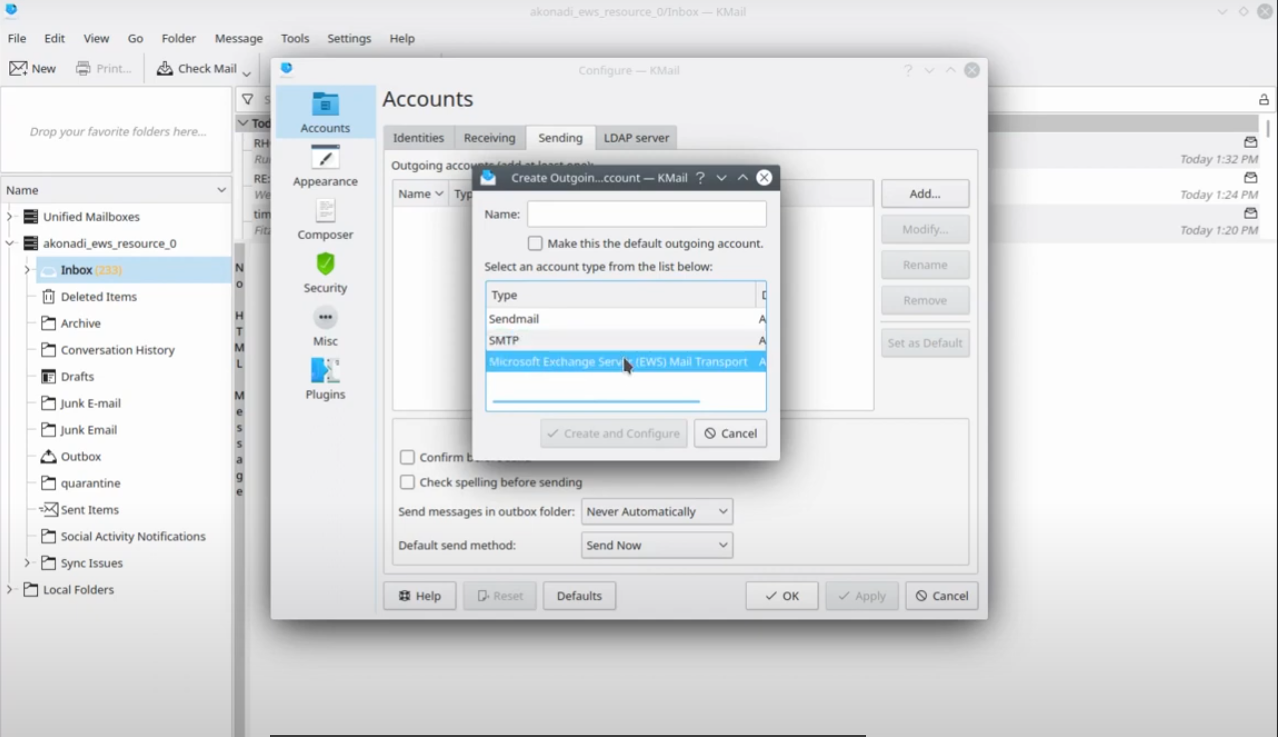
7. Name the new sending email account accordingly, and you will have completed KMail application setup for both receiving and sending emails.
8. The first time you use Evolution to access your Office365 email, you will have to grant the application permission to access your account and manage your email. You can scroll through the "Permissions requested" window for more details. When you are ready to continue, hit Accept. The prompt will close and your account will log in and begin downloading your mail. In the future, you will not have to complete this step again.
Referenced from: Youtube