Mac OS X: Boot Camp Windows 7 Installation
This article has not been updated recently and may contain dated material.
Things You Will Need
Before you Install Windows
- A printed copy of this guide contains information you need to refer to when installing Windows.
- A Back-Up of your Disk BEFORE Partitioning or Installing Windows. If you are installing Windows on a portable computer, connect the power adapter.
- The keyboard and mouse or trackpad that came with your Mac. If they aren't available, use a USB keyboard and mouse.
- A built-in disc drive or a compatible external optical drive.
- An installation disc with Windows 7 x32/64, depending on your Mac model.
- An external drive, such as a USB thumb drive, is formatted as MS-DOS (FAT).
After you have Installed Windows
- Install support software that lets Windows work with your Mac hardware. (See Step 11)
- You can download the support software to an external drive.
- To format an external drive as MS-DOS (FAT), use Disk Utility, located in the Other folder in Launchpad.
Installation Instructions
1. Check your Mac for updates.
- Select the Apple icon at the top left of your screen and click "Software Update...". Install any available updates.
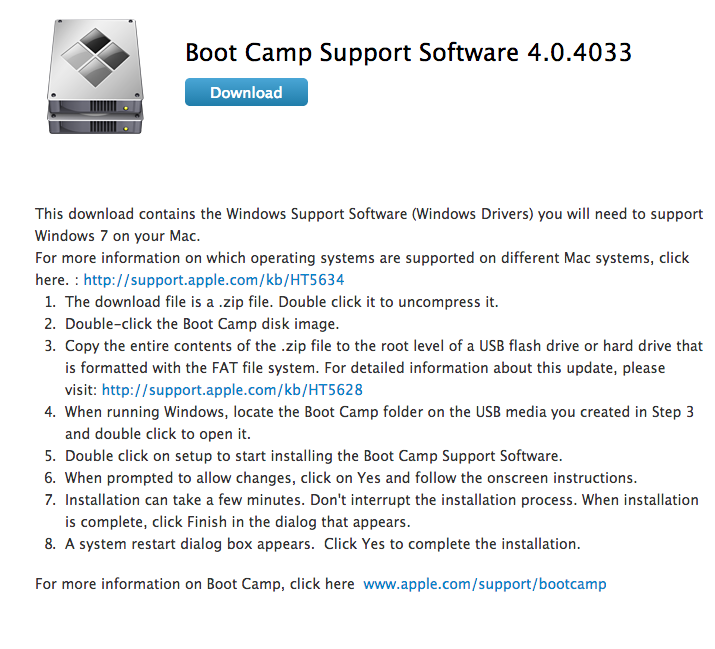
2. You will now download the Windows support software (drivers). This software allows Windows 7 to communicate with your Mac hardware.
- Go to https://support.apple.com/en-us/102622 and select your Mac device. In the table, find the model and production date of your mac and then select the number that corresponds with the Windows 7 column. An example image of the MacBook table is shown below.
- NOTE: If you do not know the model and production date of your Mac, it can be found by clicking on the Apple menu at the top left of your screen, selecting About this Mac, and then clicking More info.
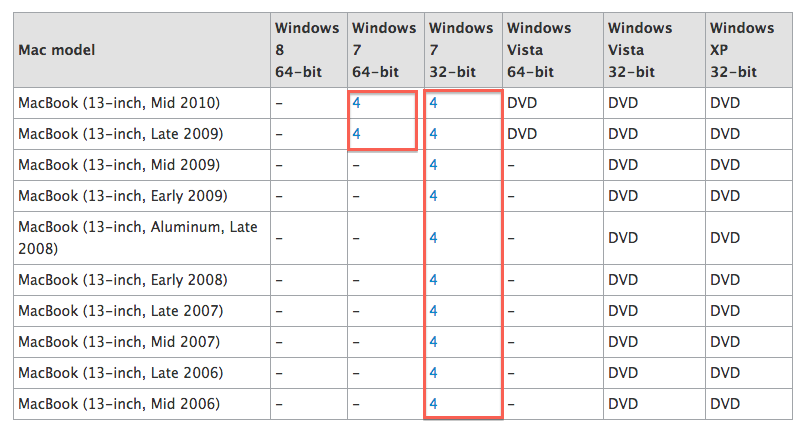
- Once you have selected the number (like the one shown in the image above), download the Windows support software and follow the instructions to copy the .zip file contents onto your USB thumb drive. Once you have done this, your USB thumb or external drive can be set aside as it will not be needed until later.
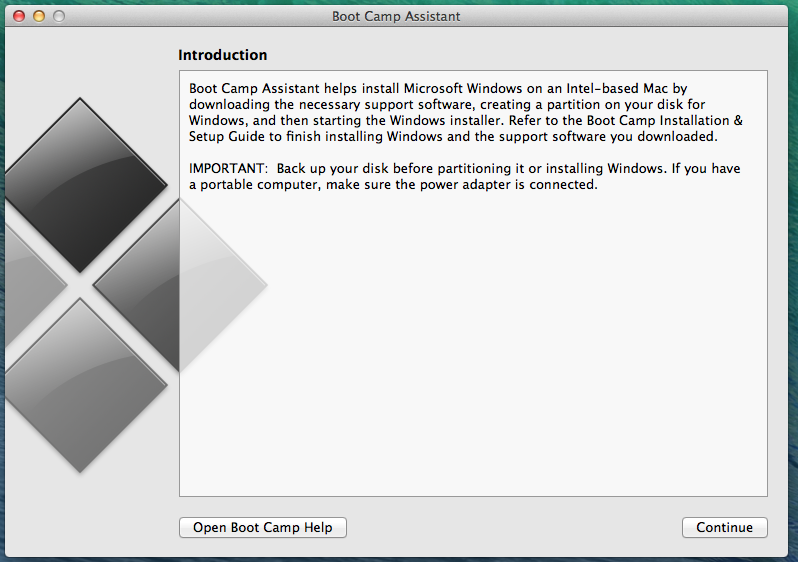
3. Open Boot Camp Assistant.
- Select the magnifying glass at the top right of the screen and search for "Boot Camp Assistant".
- Select the program to open it. If you haven't made a backup of your hard drive DO SO NOW.
- Click Continue at the bottom right corner of the window.
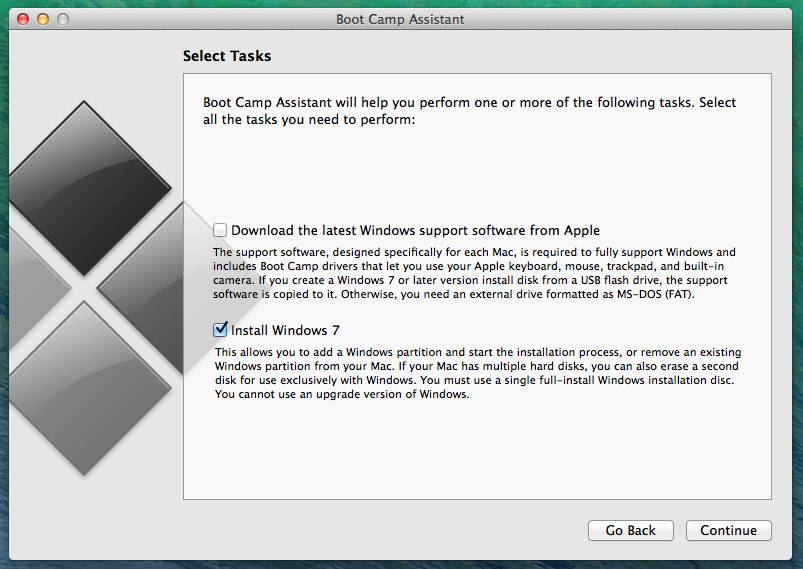
4. Insert your Windows 7 installation disc.
- Uncheck the box that says "Download the latest Windows support software from Apple"
- Click Continue.
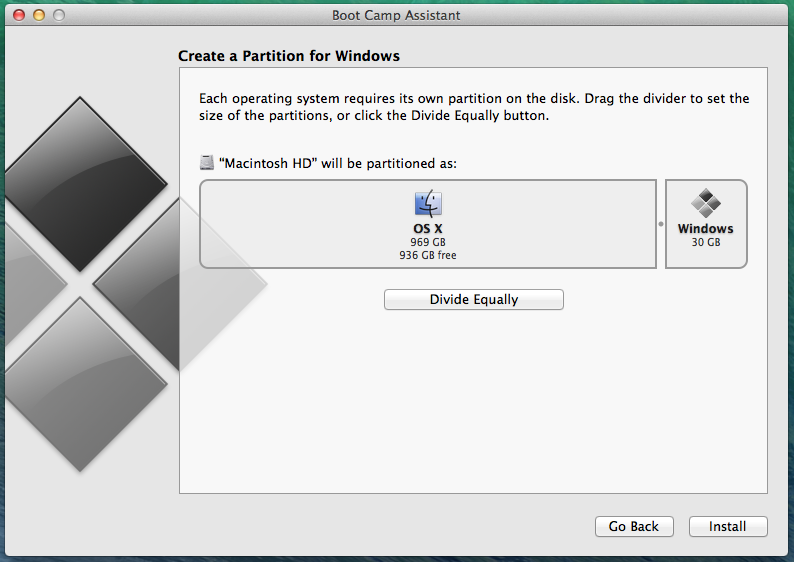
5. Boot Camp will now partition your hard drive to make space for Windows 7.
- A recommended amount of 30GB of space was partitioned in the example image below, however, if you wish to adjust the partition size simply click and drag the slider to adjust to your preference.
6. Click Install.
- Boot Camp will create the Windows partition.
- Restart your Mac.
- Open the Windows installer.
7. In the Windows installer, follow the onscreen instructions until you're asked whether to do an Upgrade or Custom installation.
- Select Custom Installation.
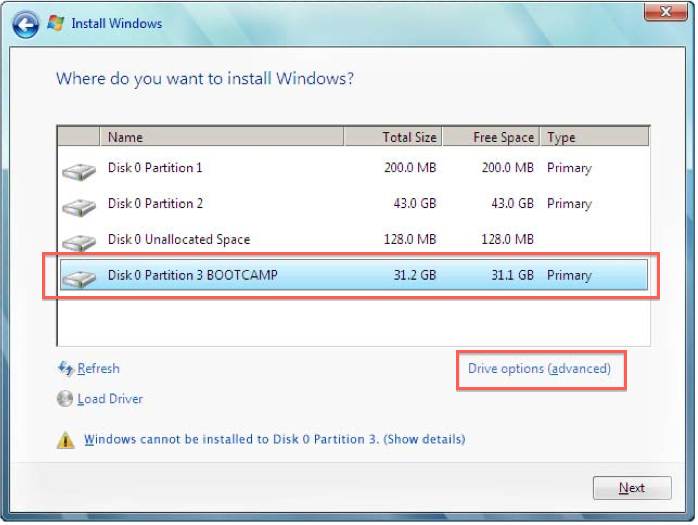
8. When asked Where you want to install Windows:
- Select the partition named "BOOTCAMP"
- Select "Drive options (advanced)"
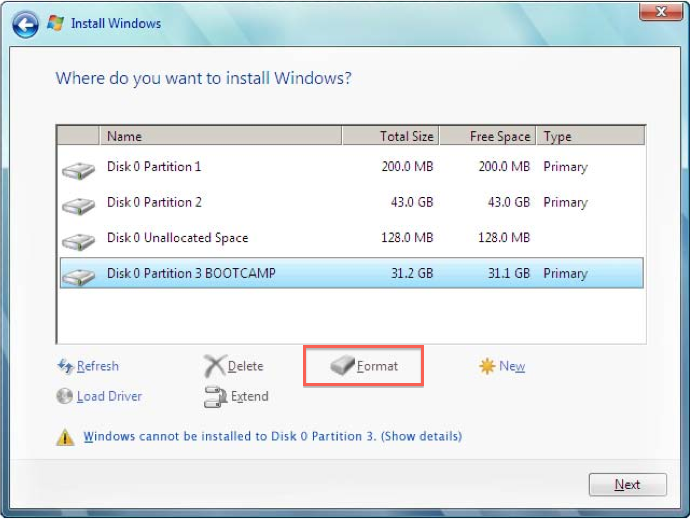
9. Click Format, then click OK.
10. Follow the onscreen instructions to finish installing and configuring Windows. After you install the Windows software, your Mac will automatically restart using Windows.
- Use the Windows setup screens to complete any final configurations-- you will eventually come to a screen prompting you to enter your activation license (The one given to you from OnTheHub).
- Alternatively, you can skip this step, however, you will eventually need to enter the activation license code later.
11. Your Mac will restart one last time and boot into Windows.
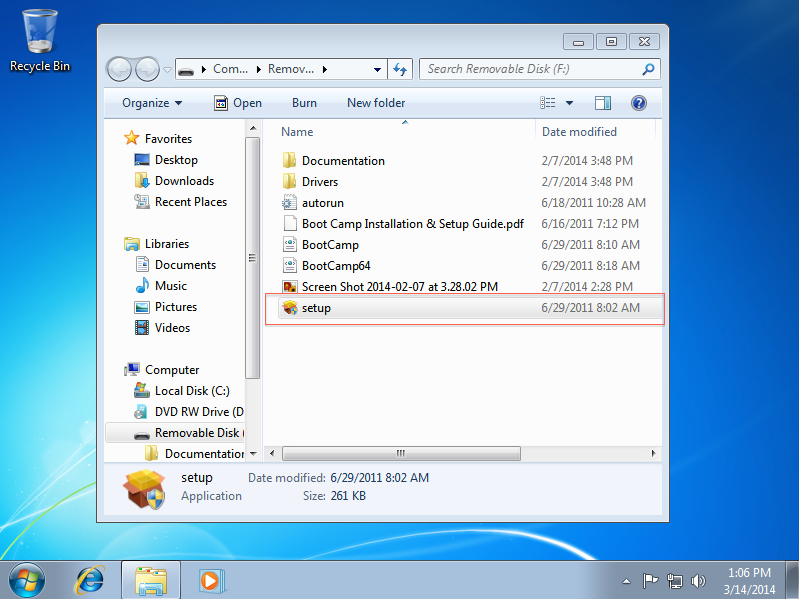
- Insert the USB thumb drive with the Boot Camp support software that you downloaded earlier.
- An installer may start automatically. If it doesn’t, double-click the setup.exe file in the Boot Camp folder of the USB flash drive and follow the on-screen instructions.
- When it has finished, your computer will restart and boot into Windows 7.
Additional Information
You may notice that when you power on your Mac after a restart or shutdown that it automatically boots into Windows 7.
- If you wish to boot into OS X instead, hold down the Option key when you see the grey screen appear at start-up and then select "Macintosh HD".
Referenced from: Apple Support
17349
3/20/2024 10:38:45 AM