LSUMail: Export Email (Office365 Outlook)
Important Notes Before Exporting:
1. Make sure all folders are up to date before attempting to begin:
- Click the Update Folder button in Outlook.

- Check the status bar for the All Folders Are Up To Date status message, located at the right.

2. Make sure you have a big enough hard drive for the emails; this is particularly important if you are on an LSU-owned computer trying to export a file to an external storage device.
3. Make sure you have a reliable, uninterrupted connection. Exporting emails, on average, is a lengthy process that will take some time. Wireless connections may work but it is highly advisable for email boxes more than 5GB in size that you are connected via an Ethernet cable to the LSU network. If you are not on an Ethernet connection and wish to be on it, please ask your TSP and see the article Bluecat DRP: Register Your Computer.
If you do not follow these notes before beginning, you are much more likely to get errors or unsuccessfully export all of your emails. Please carefully ensure that you have done these three steps before beginning.
To Export Emails from Office365 on Outlook:
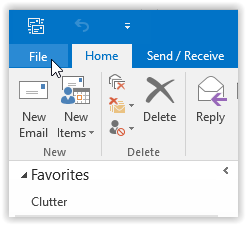
1. Within Outlook, switch to the File tab at the top of the screen.
2. In the left panel, select Open & Export.
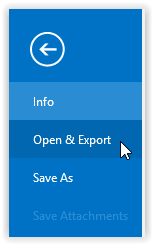
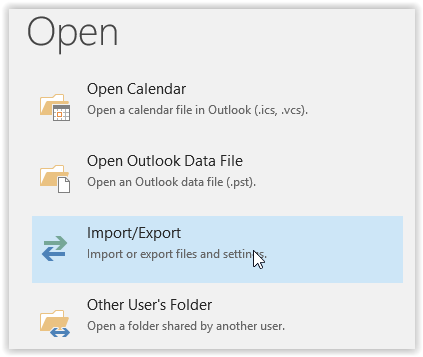
3. Click Import/Export from the list of Open options.
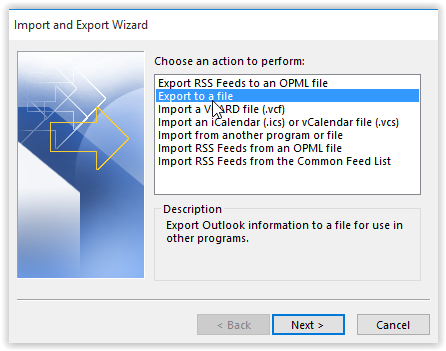
4. Choose the action "Export to a file" within the Import and Export Wizard and click Next.
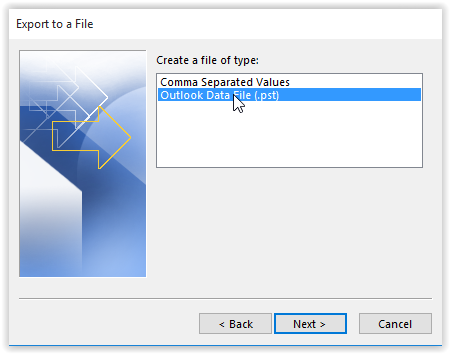
5. Select the "Outlook Data File" type and click Next.
6. Click the desired folder before selecting Next in the bottom right-hand corner.
Please note: Exporting to a location on your hard drive or a jump drive (as opposed to One Drive) is recommended. This is because your OneDrive data will not be available after your time at LSU.

7. Click Browse to set the save location of the export and then OK.
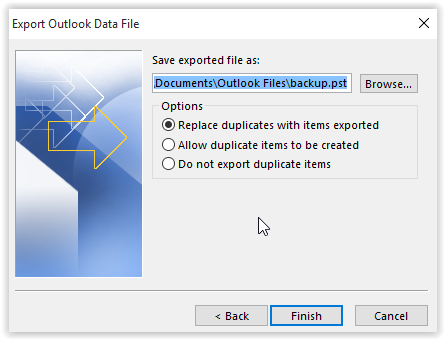
8. Select Finish at the bottom of the screen.
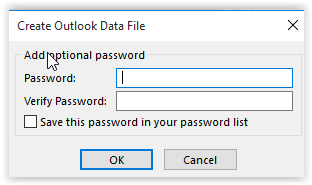
9. An optional password will appear; add a password if you would like and select OK when finished.
Referenced From: Microsoft
18079
8/6/2025 3:03:09 PM