To Start a Customer Support Session:
1. Open BeyondTrust from your desktop and login with your MyLSU credentials. If you do not have access, contact your BeyondTrust administrator.

2. There are two ways you can invite a customer to start a session.
1. Click the Start button at the top left of the screen.
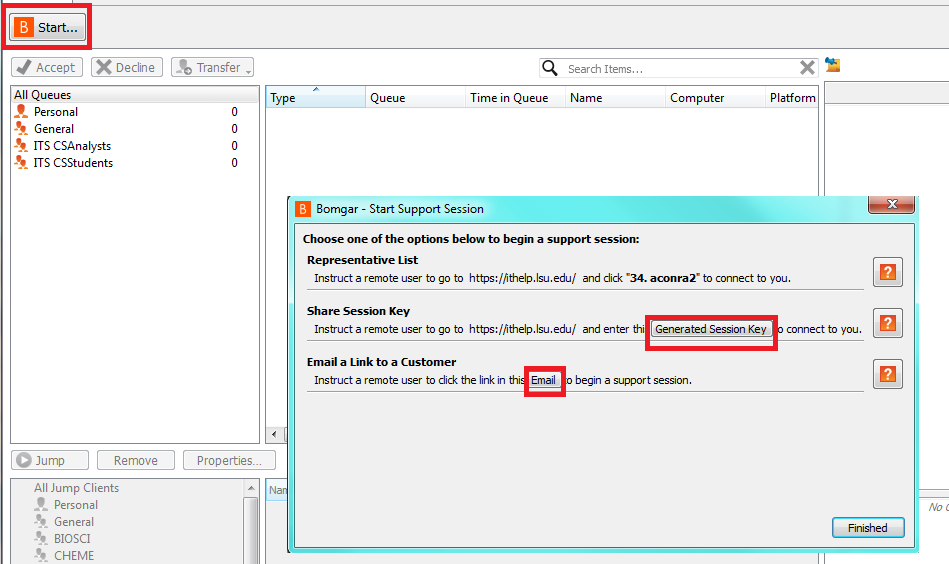
2. Choose Generate session key and have the customer enter the number at the BeyondTrust web portal.
3. Choose Email a link to a customer, which will open a new message in your email client with a link to the session.
OR
1. Click the Support menu at the top left of the page then Generate Session Key.
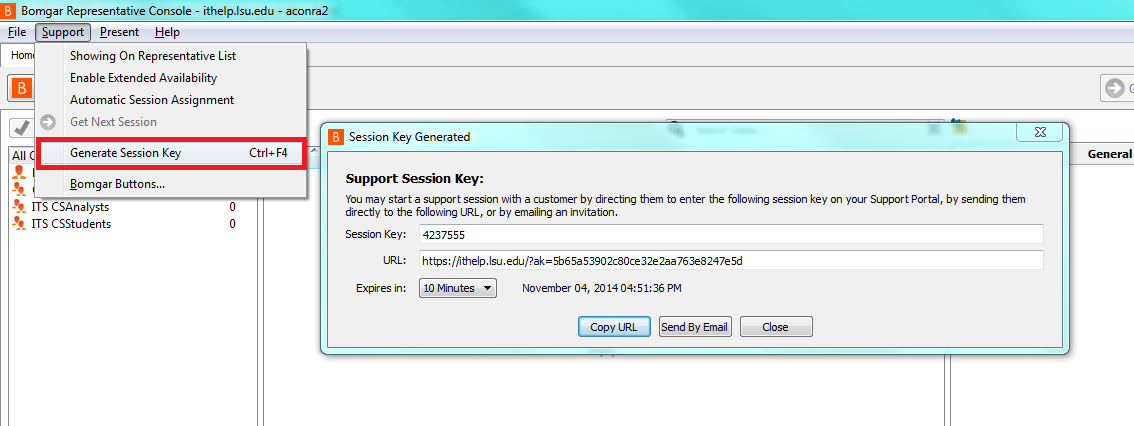
2. Provide the customer with the generated number.
3. Copy and paste the link into an email or other type of message.
4. Here you can adjust the length of time for which the key and/or link is active.
3. You can also invite a customer through the BeyondTrust Web Portal if you are fine with having your name visible. When you login, your name will be displayed on ithelp.lsu.edu, and the customer can click on your name to start a chat session with you. From here you can send them a request to launch the full BeyondTrust client if necessary, and from there you can begin screen sharing.
- Note: You can change your visible name here and in the program by logging into ithelp.lsu.edu/login and scrolling all the way down to the bottom of the page, then changing your display name there.
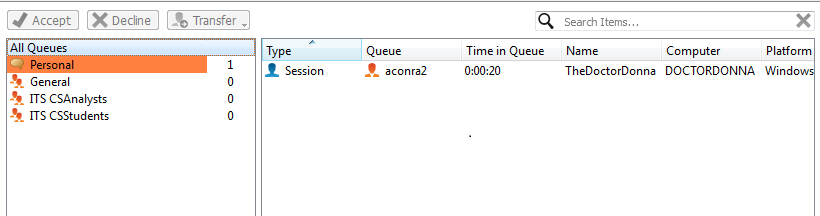
4. Once the connection has been established, a session will appear in your queue. You can Accept by either clicking on it and pressing “Accept”, by right clicking it and accepting, or by double clicking it. You can also transfer the session to another available representative if you are no longer able to assist the customer.
- Note: You can only decline a session that comes to you when the customer clicks your name at the web portal to chat, not when using a session key or email link.
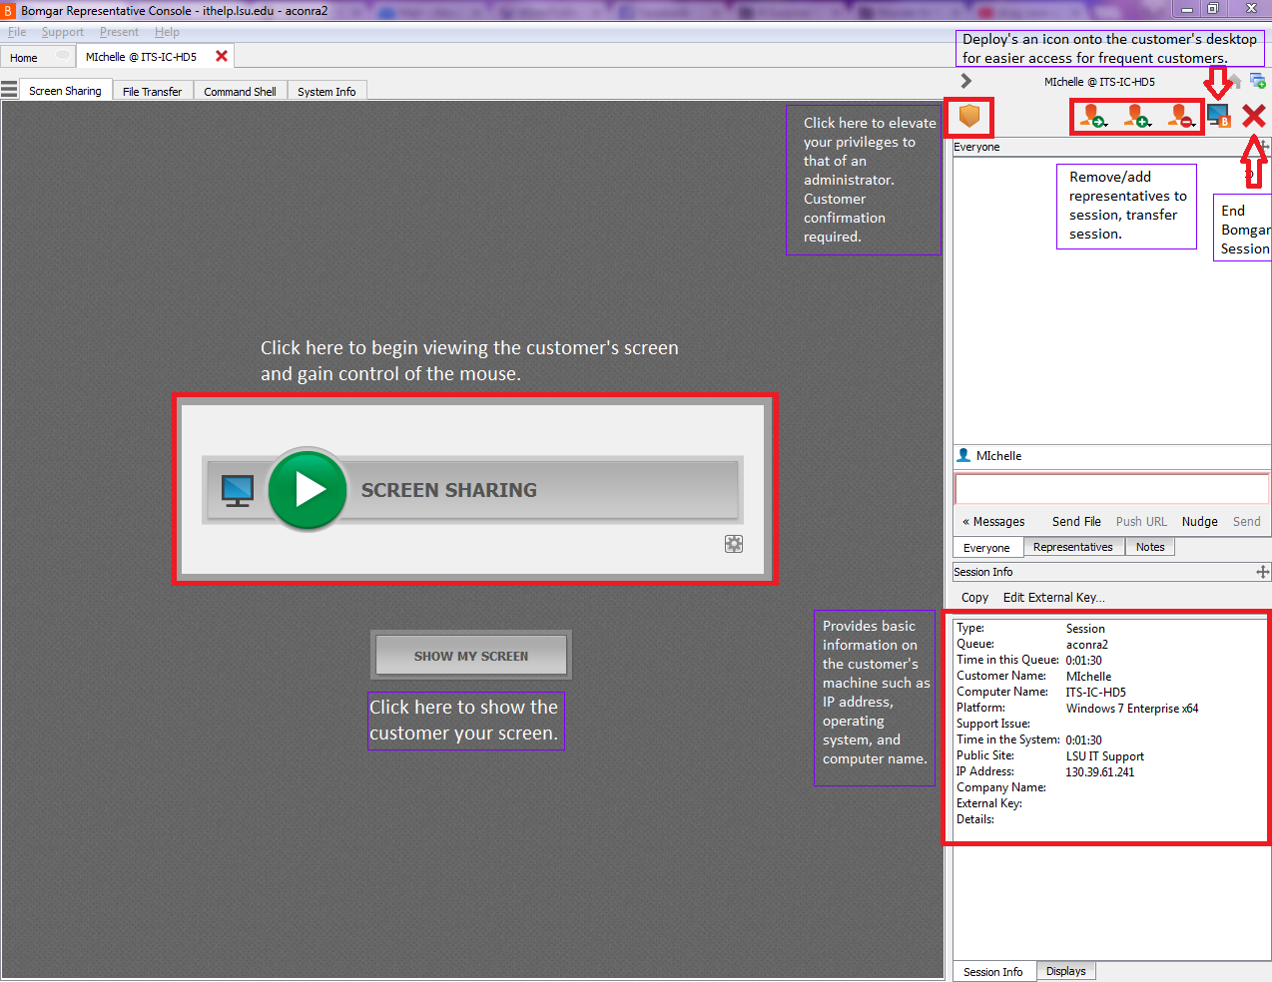
5. After accepting, you will be placed in a chat session with the customer along with options to start other types of troubleshooting. From here, you can determine what type of support will be best for the customer. You can chat, send files, access the command prompt, and view system info such as browser version and recent events, all without initiating screen sharing. You can also transfer the session from here or add in other representatives for additional support.
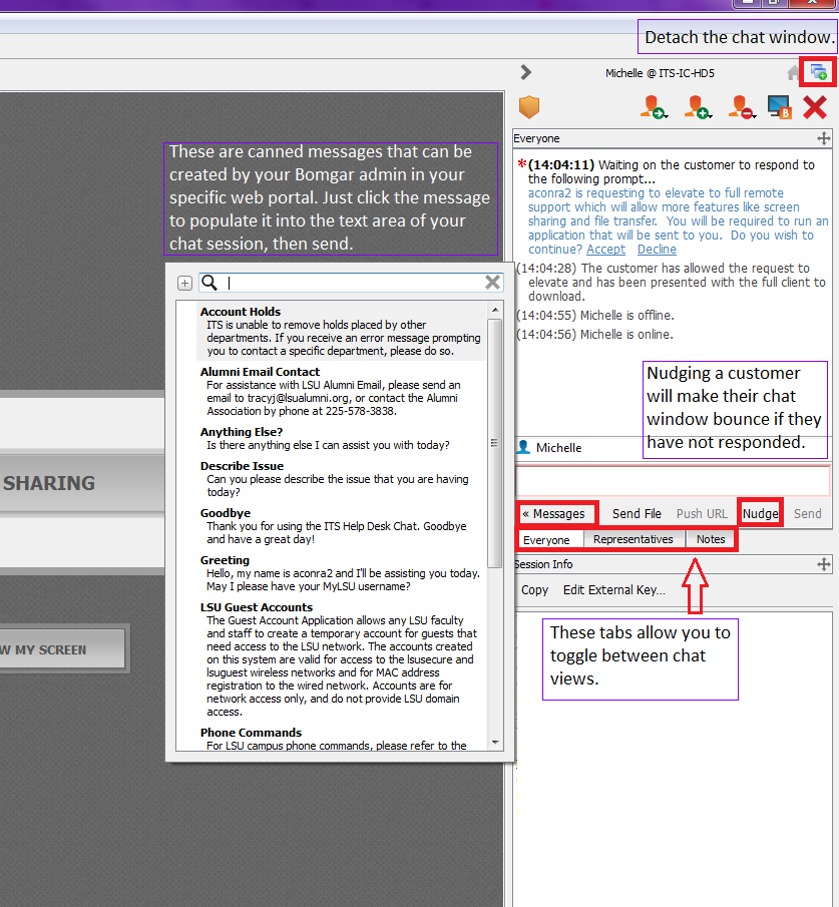
6. You also have "canned message" options that will auto populate your chat box with a preformatted message, such as a Greeting or Goodbye sentence. You can select one of them by clicking the Messages button at the lower right of the sidebar, then clicking an option. Once the message populates your chat box, click Send.
7. For starting Screen Sharing and Presentations, please see the article BeyondTrust: Screen Sharing and Presentations. There are also some non-screen sharing options that you can use to troubleshoot while in the session, described below.
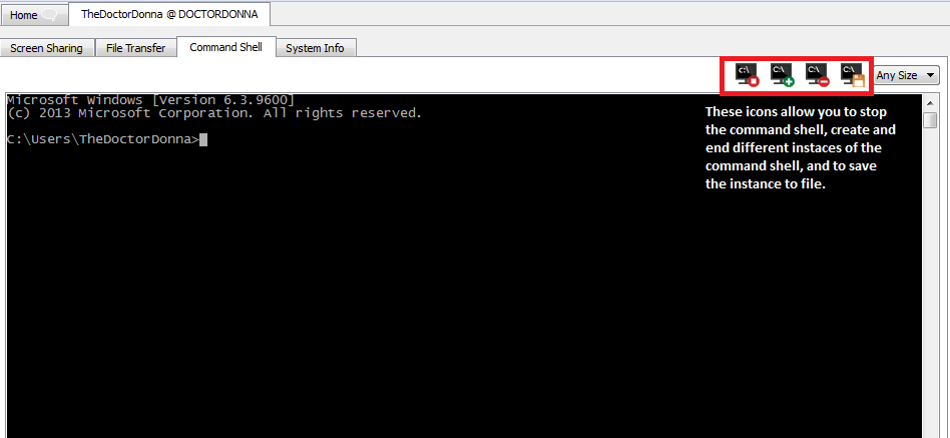
8. You can create, end, or save an instance of a command prompt (or terminal) by clicking the Command Shell tab at the top and using the buttons on the top right of the screen.
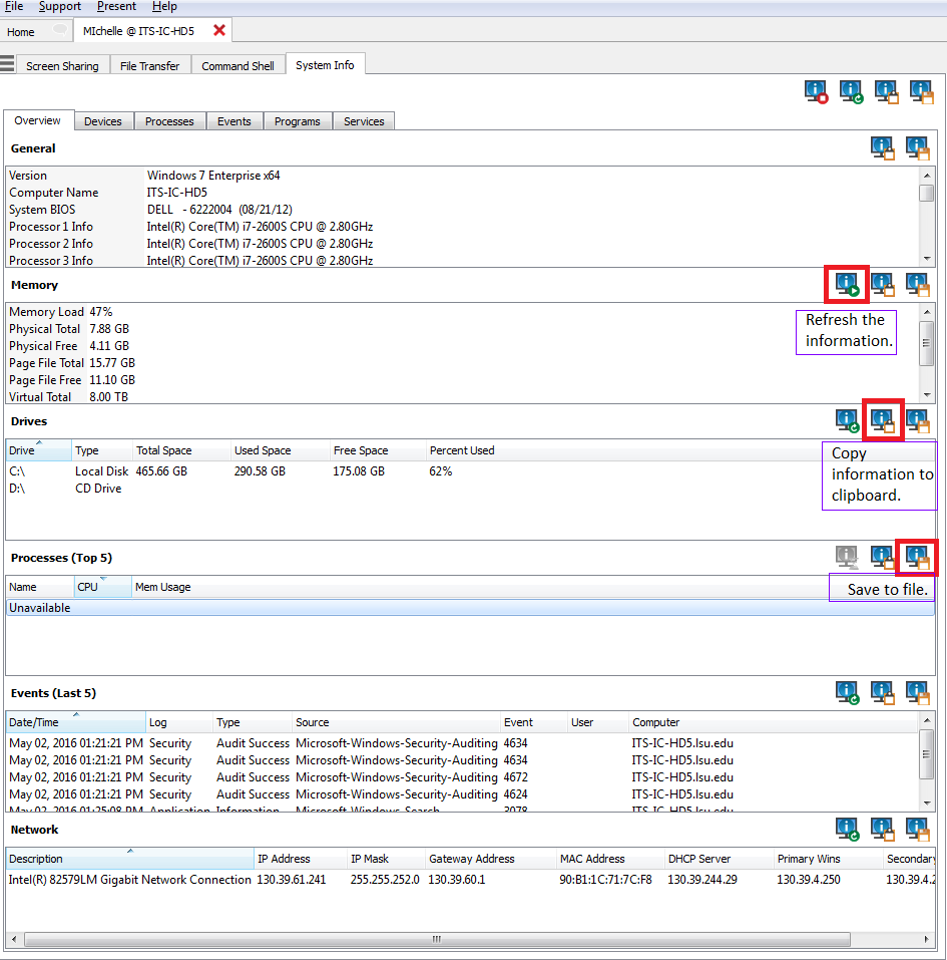
9. The System Info tab allows you to view information ranging from the customer’s default browser and its version to what processes are running to what events have recently occurred on the machine including error messages.
Customer Side
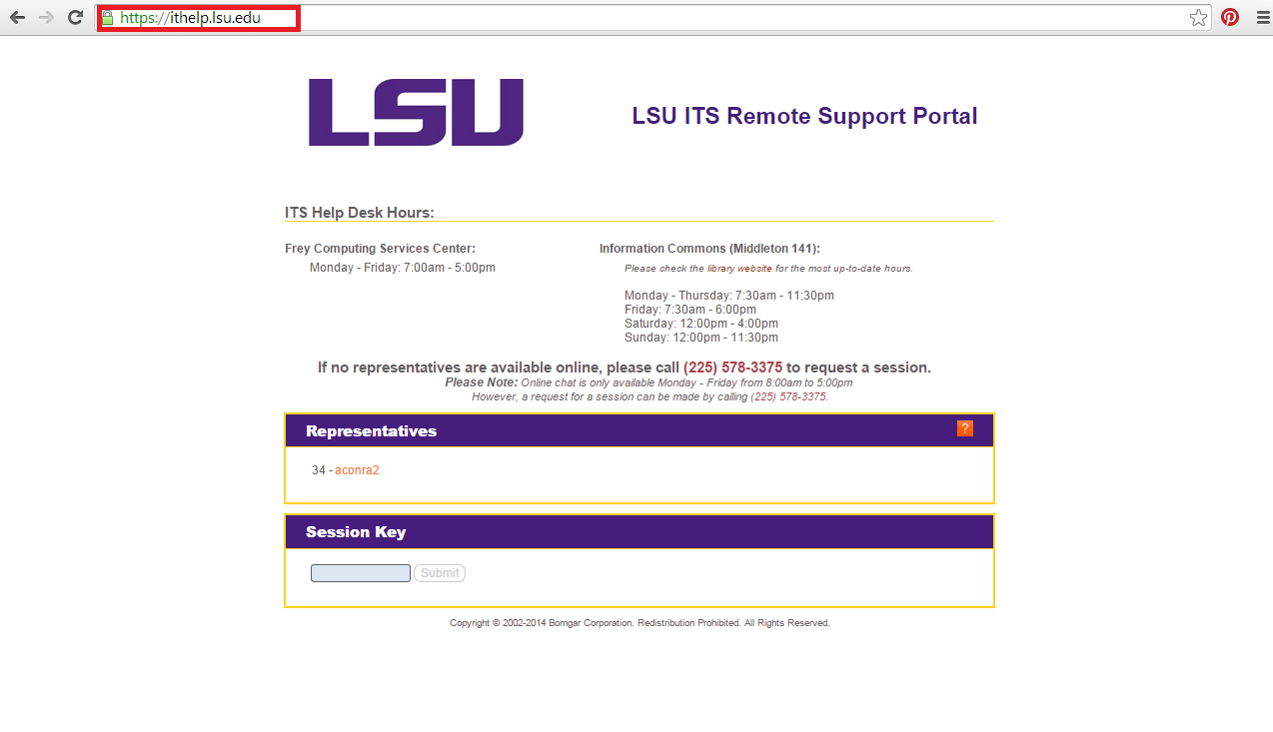
1. The customer should begin the session by going to ithelp.lsu.edu and entering the number you give them in the Session Key box, then click Submit.

2. The connection should start automatically. However, a file may be downloaded for them to click and run. In either circumstance, instructions will appear on their screen.
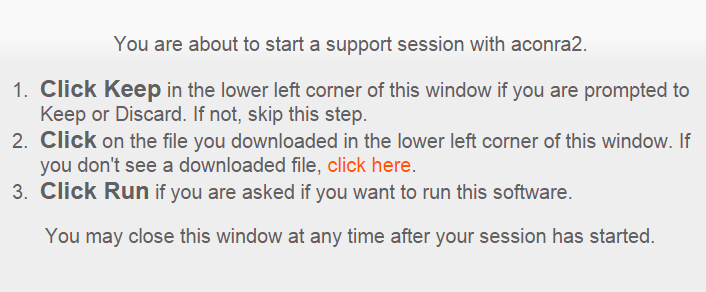
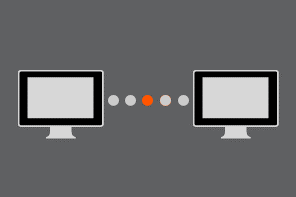
3. Once the connection has begun or they have run the file, an image of two computer monitors will appear until the connection is established.