** OWA Variation Notice **
OWA is updated and experiences formatting changes regularly. This article will present a generic set of instructions for use of OWA. It should be used as a guide while using OWA. Screenshots and instructions may be slightly different from the current implementation of OWA, and a user may see something different than what is shown in this article. For issues that may arise during the process of using this article, please contact the Service Desk for further assistance.
QUICK Rule Setup
This allows you to quickly create a rule based on an existing e-mail in your Inbox.
1. Sign in to your LSUMail Account through OWA. (mail.lsu.edu)
2. Right-click on the e-mail message and click Create Rule...
3. This will bring up a pre-populated Rule wizard that you can use to build your rule quickly and easily.
Advanced Rule Setup
Mail rules allow you to manage or organize your incoming e-mails automatically. You create a rule that selects messages based on a condition and then apply an action on the messages that fit the condition.
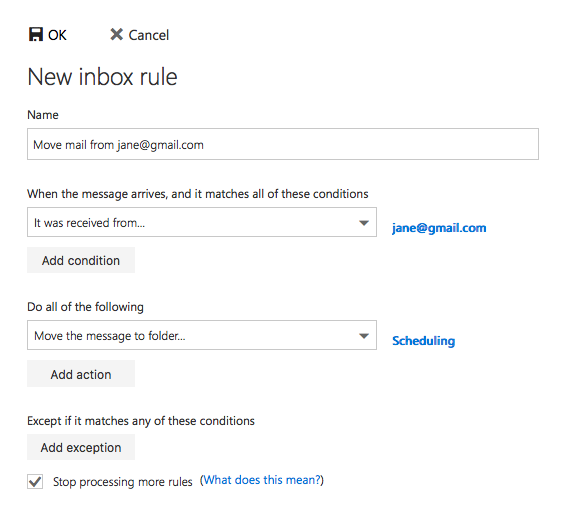
As an example, this article will document the steps to write a Mail Rule to move all incoming e-mails from jane@gmail.com into the Personal folder.
1. Sign in to your LSUMail Account through OWA. (mail.lsu.edu)
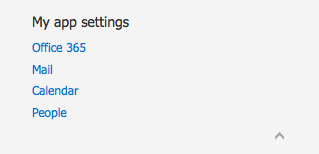
2. Click the gear icon at the top right-hand corner of the page.

3. Select Mail under My app settings.
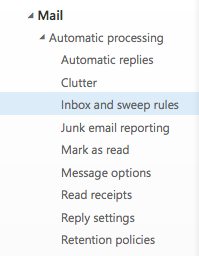
4. Select Inbox and Sweep rules on the left-hand side navigation panel.
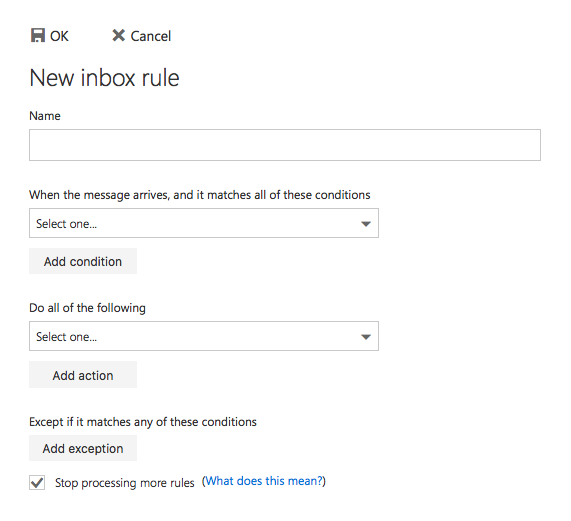
5. Select the rule condition(s), action(s), and exception(s) that you want to use from the drop-down boxes.
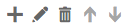
NOTE: Additional conditions, actions, and exceptions can be added by clicking the + button.
Example Rule Setup
In this example, we want to apply the rule to e-mails received from jane@gmail.com and move them to a folder.
1. Starting from Step 5 above, enter a name for the rule.

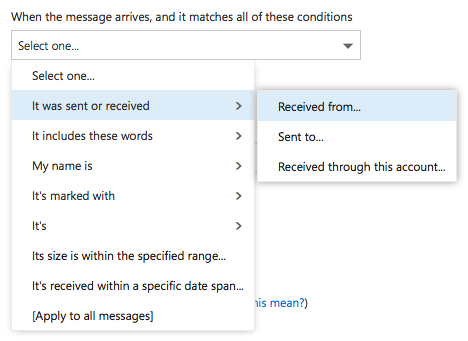
2. Click the arrow for the drop-down box under When the message arrives, and... select It was sent or received, and then select Received from...
3. A new screen will appear allowing you to select, search for, or enter sender information. Once you have added the sender(s), click the Save button at the top of the screen.
NOTE: In this example, the sender's e-mail address was manually entered into the From: field. When manually entering an address, press the Enter key after each address.

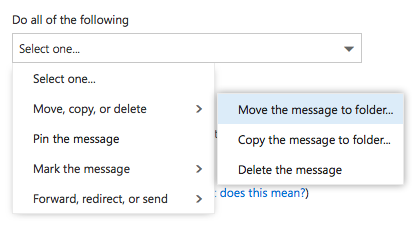
4. Click the arrow for the drop-down box under Do all of the following, select Move, copy, or delete and then select Move the message to folder...
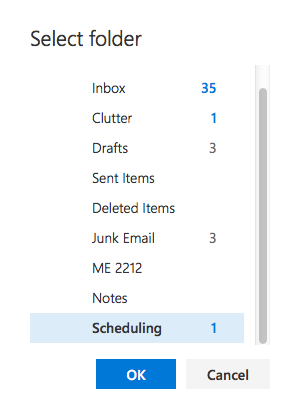
5. Select a folder from the list that appears, and click the OK button.
6. At this point, additional conditions, actions or exceptions can be added to the rule by selecting the appropriate button(s).
7. Click OK at the top of the screen to save the rule.
8. You may get a Warning that using Outlook Web App to manage rules will delete mail rules which had been turned off (disabled) by Outlook.
-
You should create and manage mail rules exclusively either from OWA or Outlook so that there is no interference between the two e-mail programs.
-
Click Yes if you plan to manage mail rules only from OWA.
-
Otherwise, you should click No and open Outlook to create and manage Mail Rules.
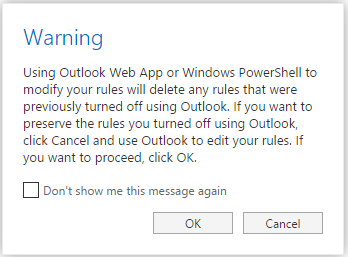
9. If you select Yes: the Mail Rule will be Saved & Turned On (enabled).
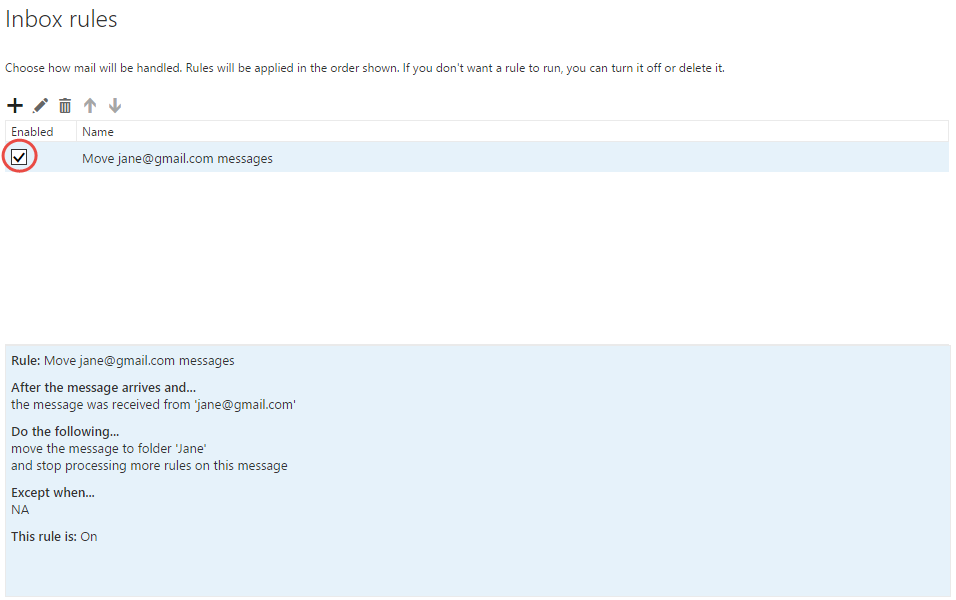
10. You can Turn Off a Rule at any time by un-checking the box next to the rule name.
LSUMail Server Settings
Outgoing Mail Server (SMTP):
outlook.office365.com Port: 587
Encryption Method: STARTLS
Authentication: OAuth2